.JPG)
Sunday, June 23, 2013
Past the crisis
It was all doom in the last blog, but I think I have survived the crisis. I'm just plodding on now. I cut away some material from the underside of the wobbly board with scrubplane and gouges, until it didn't wobble anymore. Then I finished the middle board, lots of planing in that one too, but because it is narrower it went a lot quicker. Then I finished all the ends, sawing to length and planing the endgrain smooth. I reduced the width of both large boards a bit for better proportions, had to rip one board and use the drawknife on the life edge of the other one. And finally, I am starting to get used to the look of the large stain. And this is where I am now.
.JPG)
Monday, June 17, 2013
Nothing but trouble
In my last blog post I reported about a spontaneous bow having appeared in the second board. After clamping it down to my bench for a few days it still was bowed, just a little less, but in the end it doesn't really matter. The undercarriage of the table is quite stiff in the length so it is not difficult to clamp the board down.
At least it didn't twist! But to compensate for so much luck, I found that the first board has developed quite a bit of twist in the last couple of weeks. When I clamp it down on the frame it lifts one of the legs into the air. It may be stiff in the length, but it hasn't much against twist. This not how I like things to be, so I shut the door and turned away from this disgusting project.
In the mean time we had an interesting discussion on one of the woodworking forums about how they would have done thicknessing in the past. The opinion was that thicknessing would have been a rare occupation back in the days when they didn't have machines to do the job. Some people reported to have seen trestle tables where the boards were up to half an inch different in thickness, and where the trestles had been worked locally into the underside of the table top until everything sits true on the upperside. That's an interesting idea. I don't need to rework the whole boards to make them true again, I can just remove a bit of wood where it is needed. Nobody is living under the table, so it won't be very obvious from the outside.
In the meantime I discovered another problem. This wood is stained pretty badly in some spots. I guess it is a drying defect and a fungus has invaded the wood. That doesn't need to be a problem as long as the wood stays dry, epecially not with a finish. But the stains can look a bit uncivilised. I have cut around most of them, and on the first board of the table top, the stains are just small blotches nicely devided over the length. That just looks "artistic". But the second board happens to have a big blotch right in the middle, and I am not entirely happey with that.
.JPG)
In an attempt to mask that one, I have experimented with choric bleech. That works very well to make the stain a lot lighter in color, but it needs to be metaculously applied, because otherwise the wood around it is bleeched too.
In the meantime I have planed the board down another 1.5mm (thicknessing again!) And the spot is smaller but didn't go away. So before I'm going to finish the board I will try the bleeching method again.
Well, this project keeps on delivering! I'm nowhere near the finish line yet.
Saturday, June 8, 2013
Cheated!
Well, the board has been planed down to the line in three evenings, about four hours total I guess. I was pretty pleased with myself and got my straightedge to see how straight the board was. Remember, the top face was flattened first, and the thickness of the board marked with a marking gauge from the top. If I remove all wood to the line all around the board, the bottom side should be rather flat too. So you can probably understand how perplexed I was to see a considerable bow in the wood. Quickly turning the board over I found the formerly very straight face to be not very straight anymore.
.JPG)
The wood cheated me!
Several things worked against me. First we had a change in the weather. The long, cold and wet spring changed into nice sunny summer weather. Then, I have removed more wood from one side then the other, which tends to release tension in the wood in uncontrollable ways. And finally, the worst bow is at the end with the two big knots. Such defective wood can do anything you don't want, of course.
Anyway, these are times when you only want to stick the project in the stove and have a big bonfire. But for now I have just stickered the wood and clamped to workbench top, hoping a little bit of the bow will reverse again. The rest will hopefully straighten out when screwed to the the undercarriage.
Tuesday, June 4, 2013
Thicknessing (again)
And there we go again. After marking the desired thickness on the sides of the board (3,8 cm) I started with the scrub plane. There is a problem at the end of these board, the two big knots. The wood is rediculously hard around them. It's mostly endgrain in the knot of course and also the wood around it doesn't like to be scrubbed. The small plane mostly just dances over these spots. So in order to get some work done I used a gouge and chopped out the wood to more or less the required depth. After that I could remove the rest with the scrub and the foreplane.
.JPG)
And that's where I am now. I thicknessed this part of the board to final depth allready, because this is the hardest part. And I made a start on the rest of the board. It is very tiring work, after about half an hour I am drowning in sweat and my arms go limb. When I do a bit of that every evening, the board will have no other choice then to be at the right thickness at the end of the week.
.JPG)
.JPG)
And that's where I am now. I thicknessed this part of the board to final depth allready, because this is the hardest part. And I made a start on the rest of the board. It is very tiring work, after about half an hour I am drowning in sweat and my arms go limb. When I do a bit of that every evening, the board will have no other choice then to be at the right thickness at the end of the week.
.JPG)
Saturday, June 1, 2013
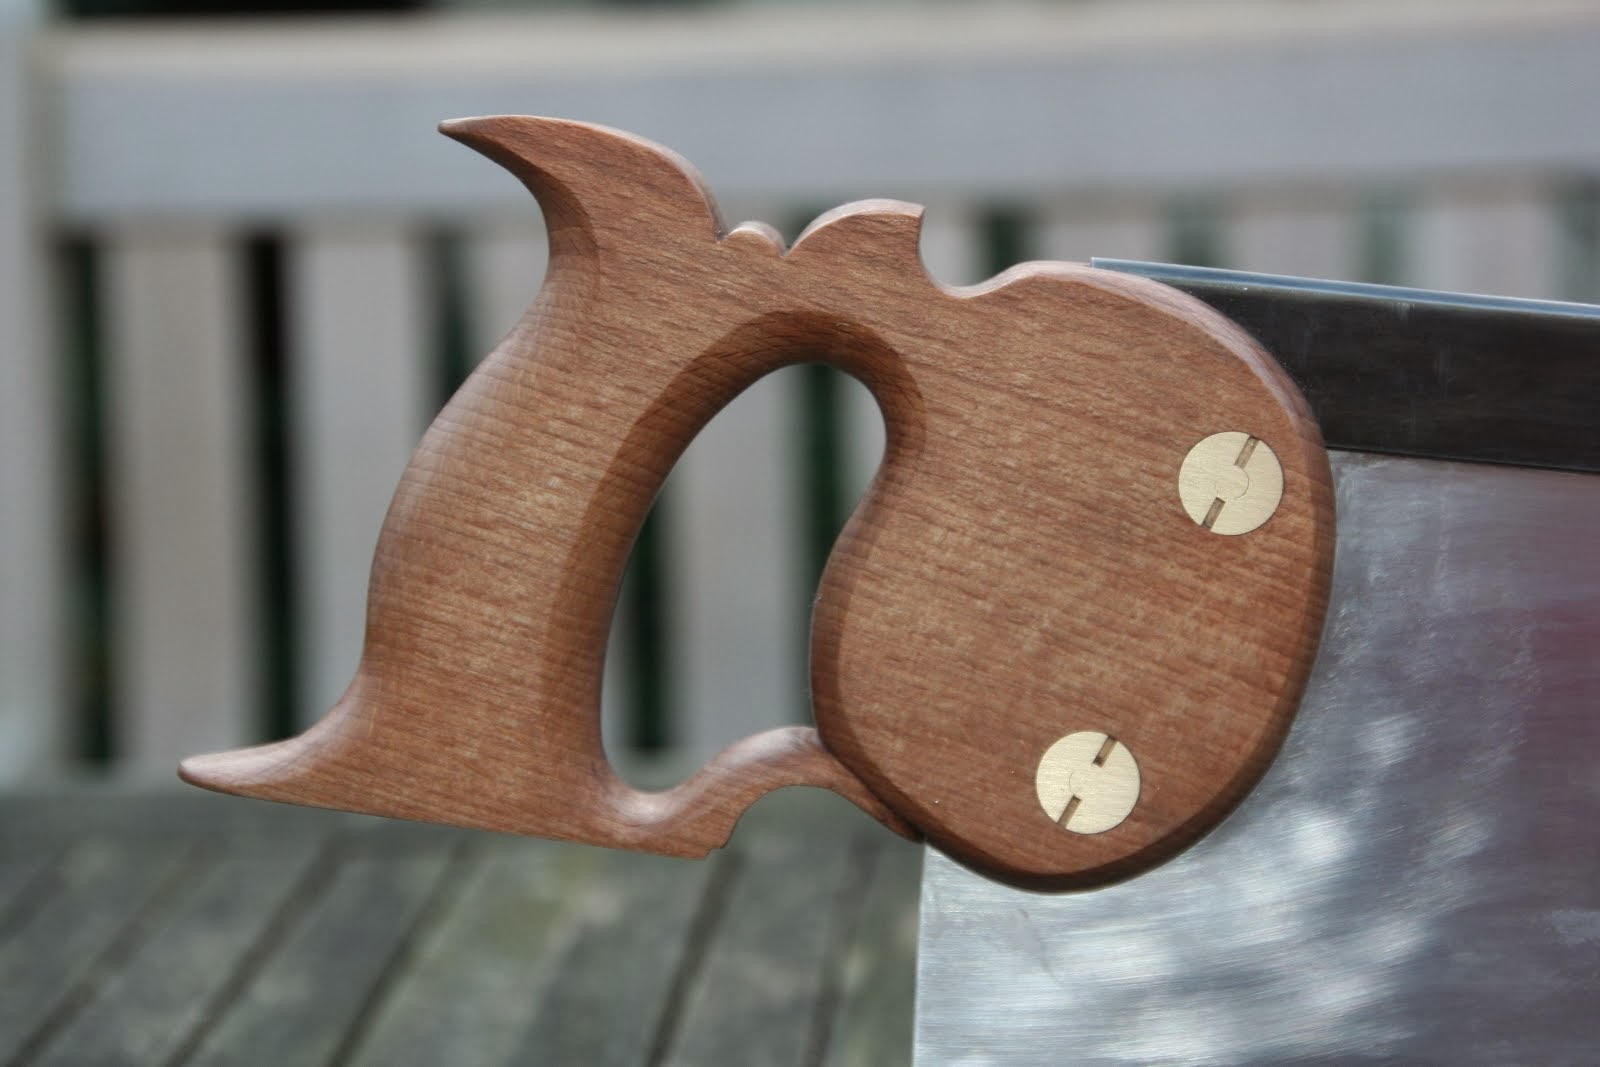
Bow saw
The dining table is getting to me. Planing large boards like this is much more difficult then I had thought. It seems that difficulty doesn't rise linearly with the size, it's at least exponential! But the second slab has now one very flat, very smooth and very exiting face.

To keep my mental sanity though this job I do some small projects in between. First it was the Ulmia saw, now it is an old fashioned, English style bow saw. I used the blades and the pattern from Tools for working Wood in New York. Sending a couple of bowsaw blades over the ocean isn't too expensive. The rest of the hardware I made myself. The frame is from some ash, with straight grain, because the tension puts a lot of force on the legs of the saw.
The handles were turned from a piece of American wallnut. I don't have a wood turning lathe, so I misused the metal working lathe at work to create my handles. I used an old gouge, sharpened as good as I can, but turning was not easy and in the end I had to use a lot of sandpaper to smooth out all the roughness. But it was fun for a while.
.JPG)
And this is the result. Not perfect at all, not even all the rasping marks have been smoothed out, but it works. Not really easy to follow a line with this saw, it takes practice. I made one critical change to the design of the saw. I added some rubber washers between the handles and the frame, so the handles don't turn around too easilly. That makes it a lot easier to use.
.JPG)
Subscribe to:
Posts (Atom)