Instagram

Saturday, January 26, 2013

Planing the legs, 1

To document the planing of the legs I made a few pictures. Starting out with the stock, rough sawn to a size which is a little over the desired size. It saves a lot of work not to plane more then neccessary, but at this stage you still want some flexibility to choose the best bits of wood.

First planing a face to get a flat surface. I use a foreplane with a cambered blade. I set it rather rank, but not too much. The wood is quit hard, so you want a setting that doesn't wear you out too much. Now it is a matter of removing the rough sawmill cuts and at the same time to remove all bow, cup and twist in the board. First planing across the grain, then diagonally and finally along the grain.

This leaves a very coarse surface because of the cambered iron. So I go after it with the jointer with a straight blade. This straightens the board even more.


All the time while planing with the foreplane and the jointer I check the surface with a straightedge and winding sticks. I do this often, because it is very easy to introduce a convex surface. Here you can see the two winding sticks on top of the board, they are pretty parallel allready.


When the first face is flat, I start to straighten the side of the board, perpendicular to the flat face. Put it in the vise and check the grain direction. It's always best to try as much as possible to plane with the grain. Wallnut isn't a difficult wood to plane, but you don't want to make it more difficult then neccessary. In this picture the best planing direction is left to right.


Straightening the edge and making it perpendicular to the face is a bit of a juggling act. I check the perpendicularity with a small square. Correcting it by offsetting the plane to the right or the left, or even following a diagonal course. I use the fingers of my left hand as a fence to direct the plane.

Finally straightening the edge. I start in the middle, because it is easier to make a concave edge  straight then the other way around. Then recheck the perpendicularity again. Usually that is off again, so I repeat again and again until I am satisfied.

Overall I don't shoot for perfection. It is good enough when it looks right and when the area for the joinery is nicely flat and square. The face and edge that have been planed now will be the reference faces for all further work, so I mark them accordingly.

Next installment is thicknessing the board and straigthening the other edge.

Wednesday, January 23, 2013

Cutting up the bole

Finally I collected enough courage to start cutting into my bole of wallnut timber. Allthough I really want to use a lot of handtools on this project, I started out with a circular saw (whimp!).

First deciding how I am going to cut up these planks. using the nicest ones for the table top and then finding enough dark material for the legs and stretchers. There was a big hole in this tree, so it was quite a puzzle to determine the most economic and pleasing way to collect enough wood.

I used a very simple method. With the board on a sawhorses I would draw out the cut lines. Mark 3.5 cm from the desired line, this being the offset of my circular saw, and clamp a cheap length of particle board on top to guide the saw. Then it was just a matter of cutting the piece. I had to insert wedges in the sawkerf from time to time to prevent the blade being pinched.

After three long afternoons I have now everything cut and out of the way. Time to think about the next step.


Monday, January 14, 2013

A preliminary look under the roughness

Life is a bit hectic at the moment and I don't have much shoptime. But I had to have a peek at how the wood looks under all the rough sawmarks. I was a bit afraid the wood would be very dull looking. But it seems I don't need to worry. Freshly planed with a drop of linseed oil.


Tuesday, January 8, 2013

First cut

After walking around this stack of wallnut plancks for half a year, I finally started with the first cut! This is going to be a dining room table. I bought a complete tree from a sawyer in Belgium and brought it home to let it acclimatise in my shop for a little while. That little while took a little longer of course. But now I have squared up the first two. Just getting used to the labor involved in fact.


This is just squaring up the board, removing the waney edge. Cuts like these tend to squeeze up a bit, pinching the saw blade. So I start with a little V groove and have wedges available to keep the cut open when I advance further up the cut. I don't use a fence, just follow a chalk line here. Overall the board doesn't move a lot while sawing, which is good of course.

Wednesday, January 2, 2013

Sawhorse

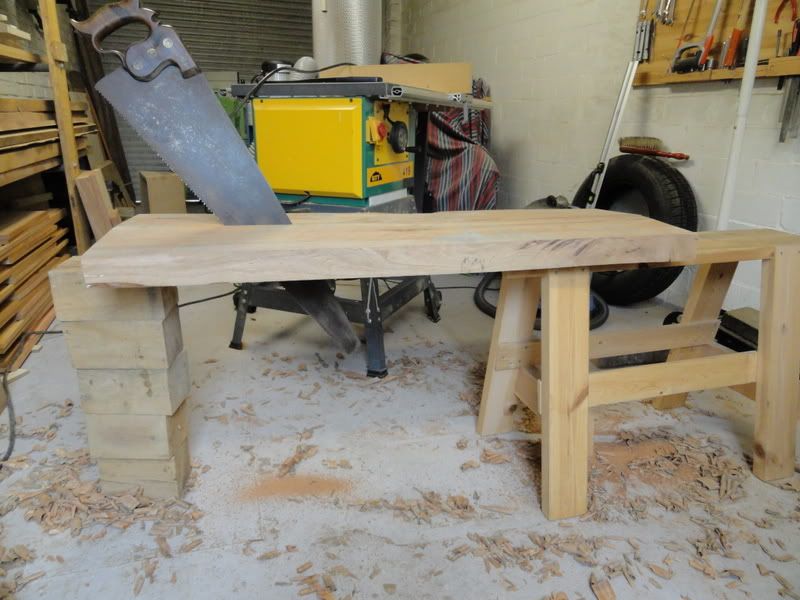
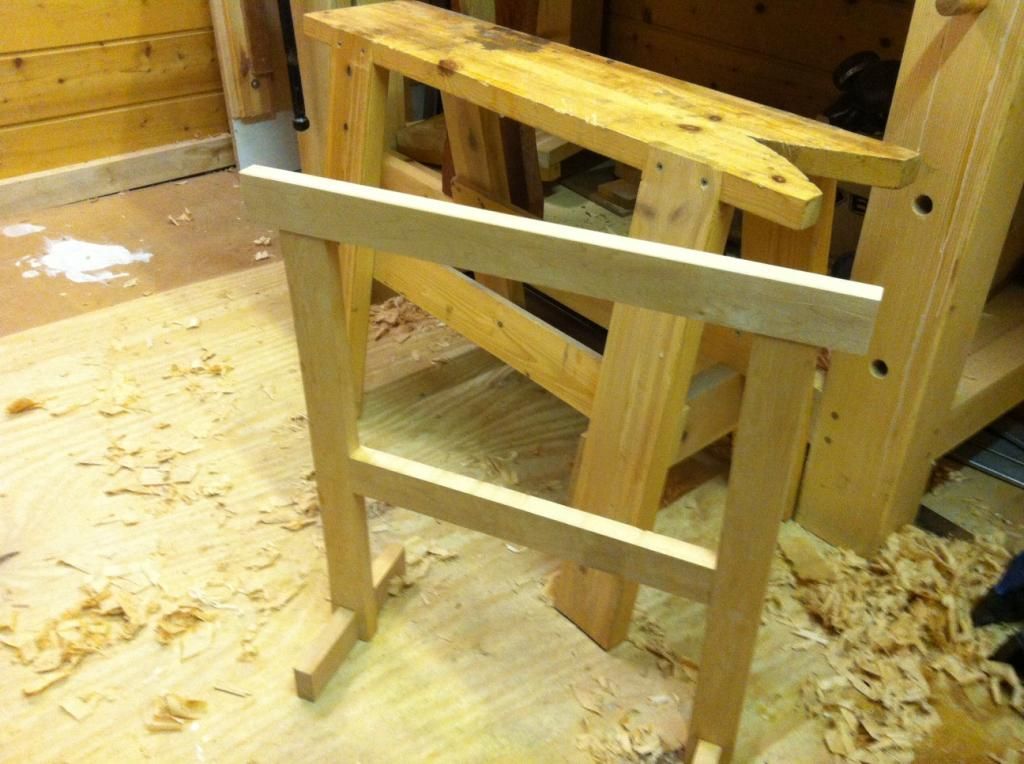
Years ago, when I just started woodworking I made a sawbench, following the design from Chris Schwarz. Sawing small stuff is easier on the bench with a benchhook, but cutting larger stuff with the handsaws is easier with such a low bench. With really large boards though, just one bench becomes a problem. Especially when ripping stock, you really need two benches. I have improvised with blocks of wood in the past, not an ideal situation.


So, time to do something about this situation, especially now I am looking at that huge stack of big wallnut boards waiting to be cut down.


Of course I could have nailed some 1x4s together, but I decided to make it a bit more fancy with handcut joints. Bridle joints at the bottom, mortice and tennon in the midle and half laps at the top. All made from some maple flooring boards.

Saturday, December 22, 2012

Long time no see

It is some time since my last blogpost. After finishing the kitchen, the drive to do decent woodwork was gone for some time. We went on hollidays to Vietnam and to France. After that I spend a lot of time with sporting activities. But now, the lust to do something in the shop slowly emerges again.

In the mean time I haven't been totally inactive. I made a new grid for the heater in the floor in the living room. I used the offcuts from the flooring and I had some leftovers from the kitchen. All together, I didn't spend any money on this project. To compensate, i spend a lot of time on this one.

Of course I couldn't help to use handtools. Sawing and chiseling the joints.


The slats were produced on the tablesaw. Sawing all these by hand sounded too much like work.

And this is the result. Time and sunshine will help soon enough to blend in the color with the rest of the floor.


Another nice little project was a play kitchen for the school where my daughter is now teaching. Mostly made from plywood. Not really much of a handtool project of course.


And now I am finishing a ladder for my nephews new sleeping room. Made from Meranti.


The next project is going to be cleaning the workshop and a lot of tool care. My tools have been seriously neglected the last couple of months and some really show it.

Monday, June 18, 2012

What is tearout?

And how to avoid or repair it with the help of the capiron? In laymans terms of course.

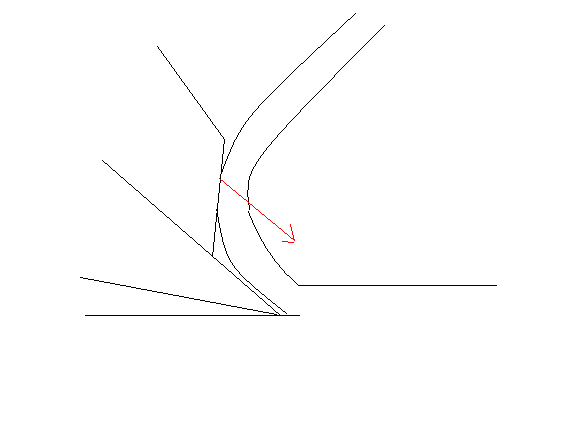
First what is tearout? When planing against the grain, you effectively drive a wedge between the woodfibers. These fibers are very strongly bonded to each other, but there comes a point where they just split apart in stead of being cut by the planeiron.

As you can see, when planing against the grain, the split tends to dive into the wood, and gives a torn spot in the surface.

When we want to avoid tearout, we will either have to reduce the wedging force of the plane iron, or somehow stabelise the wood.

The first remedy, reducing the wedging force, can be accomplished with a sharper blade. When the wood is cut before it lifts up, we avoid tearout. Another possibility is a higher blade angle. When the planing iron sits steeper in the plane, it doesn't wedge so much into the wood, but makes more of a scraping cut.

The second remedy can be reached with a very tight mouth. When the sole of the plane, ahead of the cutting iron pushes the wood down, it can't split. A small caveat, the mouth needs to be really very tight, in the neighbourhood of 0.1 to 0.2 mm and the sole of the plane must be absolutely flat and pressing down on the wood in front of the mouth. Especially in older planes, it's not unusual to find a hollow wear spot in front of the mouth.

The capiron also somes into play in supporting the wood so it can be cut.

As you can see in this picture, the curl in front of the capiron is being pushed back into the wood. Caveats here too. The capiron must be positioned really close to the cutting edge, in the order of 0.2 to 0.3 mm. It helps to make a steep microbevel on the front of the capiron, like in the picture or even a little steeper, so the shaving is really pushed over forward. And the caprion must fit the back of the blade like a glove. Any open spots, however small, will give the shaving an opportunity to clog or even dive under the capiron.

That's all. Really simple in fact.