Instagram

Monday, June 18, 2012

What is tearout?

And how to avoid or repair it with the help of the capiron? In laymans terms of course.

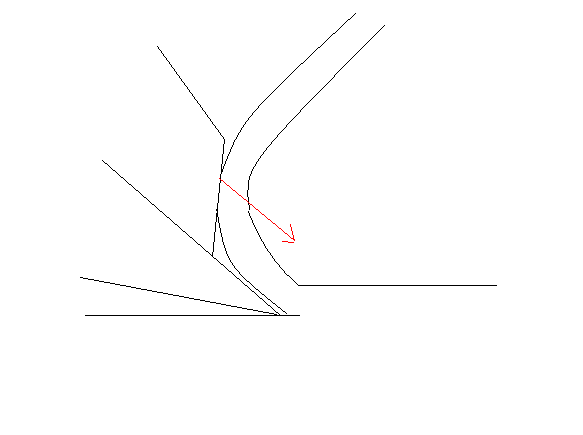
First what is tearout? When planing against the grain, you effectively drive a wedge between the woodfibers. These fibers are very strongly bonded to each other, but there comes a point where they just split apart in stead of being cut by the planeiron.

As you can see, when planing against the grain, the split tends to dive into the wood, and gives a torn spot in the surface.

When we want to avoid tearout, we will either have to reduce the wedging force of the plane iron, or somehow stabelise the wood.

The first remedy, reducing the wedging force, can be accomplished with a sharper blade. When the wood is cut before it lifts up, we avoid tearout. Another possibility is a higher blade angle. When the planing iron sits steeper in the plane, it doesn't wedge so much into the wood, but makes more of a scraping cut.

The second remedy can be reached with a very tight mouth. When the sole of the plane, ahead of the cutting iron pushes the wood down, it can't split. A small caveat, the mouth needs to be really very tight, in the neighbourhood of 0.1 to 0.2 mm and the sole of the plane must be absolutely flat and pressing down on the wood in front of the mouth. Especially in older planes, it's not unusual to find a hollow wear spot in front of the mouth.

The capiron also somes into play in supporting the wood so it can be cut.

As you can see in this picture, the curl in front of the capiron is being pushed back into the wood. Caveats here too. The capiron must be positioned really close to the cutting edge, in the order of 0.2 to 0.3 mm. It helps to make a steep microbevel on the front of the capiron, like in the picture or even a little steeper, so the shaving is really pushed over forward. And the caprion must fit the back of the blade like a glove. Any open spots, however small, will give the shaving an opportunity to clog or even dive under the capiron.

That's all. Really simple in fact.

Saturday, June 16, 2012

Chamfer Plane

Since quite some time I have a chamfer plane in my posession, made by Moseley and Sons, somewhere in the late 19th century. It's a rather complex construction. The bottom had a V-shape. In front of the iron is a moveble corebox. The bottom of this box defines the width of the chamfer to be made. This one had a steel sole on the bottom of the box, which is a good idea because most chamfer planes wear fast in this spot.


Allthough an ingeneus device, it does have some problems. The planing iron is attached with two screws in two slots! It should be possible to undo the screws a little, push down the blade and remove the iron over the head of the screws. Allas, the screws are too close together to fit through the holes in the slots. So I'll just have to completely remove the screws when I want to sharpen the blade.

Another problem is the adjustment mechanism on the side of the plane. The screws attaching the brass window to the planebody are a bit croocked. Now you can't move the corebox all the way up, because these screws protrude a bit too much.

I didn't want to remove these screws and seat them deeper. Their holes are usually pretty worn out. So I just got the dremmel and grinded the offending parts away, carefully not to mar the brass or wood. I'm sure the freshly grinded surface will stain in no time again.

The rest was easy. The plane is obviously well cared for. Sharpening was a doddle. A bit of wax on the plane and everything looked nice again. Despite the not so perfect execution of this plane, it works marvelously well. On this piece of ash I was planing into the grain with no sign of tear out. I think the bedding angle of 52 degrees helps a lot in this regards. I wish I had used this plane while working on the kitchen.


Monday, June 11, 2012

Capiron or chipbreaker

A subject, rife for endless discussions. Does the chipbreaker really break chips or is it just there to stabilise the blade and as a convenient point to attach the depth adjuster? The last few years this was not quite clear among all woodworkers. I was also sceptic about the usefullness of the thing. Then the legendary Kato video turned up again, after seemingly being lost for some decades. It really opened my eyes.

Prof Kawai and prof Kato from Japan have done extensive research to the behaviour of planing blades in wood. As a tutorial for their students they made a video showing how the chipbreaker works when planing against the wood in 1989. A link to this video and some other information is to be found on this page:
Kato video

While I was allready playing with the chipbreaker, the results were not very convincing. I meassured the distance between the cutting edge and the chipbreaker at 0.4mm and thought that was very close. The video motivated me to go even somewhat further. At 0.2mm I finally got the results I was looking for. Being able to use a dirt cheap plane on all kinds of wood with grain reversals, knots, curly stuff, ribbon striped, crossgrained, and all that without tear out!

Tear out is the bane of the handplane. You can make a wonderfull surfaces with a plane, much nicer then when using sandpaper. But as soon as the grain of the wood doesn't cooperate, you get tear out, meaning big chunks being ripped from the surface and thus ruining that nice smooth surface. There are quite a few very expensive planes on the market specialy designed to mitigate tear out. So it is pretty spectacular when you can do the same with a 20 euro Stanley #4 or even a 5 euro wooden coffin smoother.

Of course this is all nothing new. The knowledge has been available since the invention of the chipbreaker in the 18th century. But the video from Kato is so clear and so obvious, it's difficult not to be impressed.

In order to help other woodworkers who are still not getting the maximum performance from their bevel down, double iron planes, I made two videos. The first is strictly an instructional video. The second one, just shows some more detail and (I think) a quite spectaculair case of tear out being repaired with the chipbreaker at the proper depth.


Wooden planes

Wooden planes are funny things. They look liek they just can't work properly at all. And when you first try them you are inclined to agree. It's difficult to adjust them. The wood moves with the seasons, requiring regular tuneups. And the are a bit awkward to hold. But when you get them running, they are marvelous. Light wheight saves your breath. The wood glides much nicer then steel planes. And they come with these magical thick laminated blades that take an edge like nothing else.

So I decided to repair a couple of old ones. During the build of the kitchen I have accumulated quite a backlog of restoration projects and it's time to do something about that.

Two big guys waited for my attention. The first one was a jointer, about 60 cm long with a nasty crack in the nose. I really need a proper foreplane for rough wood removal. These are usually a bit shorter, so I decided to cut the offending part from the front of the plane and a bi from the back too to keep everything in balance. The plane is now 50cm long with about 15 cm between the front and the mouth. The rest was easy. Sharpen the blade with a nice camber. Fitting the capiron properly and flatten the sole. A fresh coat of linseed oil smartened it up a bit too.


In the back you can see the next victim. A 75cm (30") long jointer plane. It's a beast. But jointer planes are precision instruments, despite their size, so this took more effort to get right. On a preliminary flattening of the blade I found the edges to be not very cooperative. When I put a straightedge onto it I found that they were worn down a lot. Without some kind of power grinder to get this flat again, I decided to clip the corners of the edge, so the plane won't use these edges. With a wooden plane that is not so bad, because they tend to clog in the corners anyway. After getting the blade sharp I also straightened the edge of the caprion and fitted it painstakingly to the face of the blade. Polished up the front too.


Then my attention turned to the mouth of the plane. With the blade inserted the mouth was about 5mm wide. Although tight mouths are highly overrated, this was really too much for a jointer. So I made a patch from some beech about 1,5cm thick. I made the mortice with a tailed router (sorry...) and made it fit with a chisel. After gluing in the patch and planing down the sole of the plane, the mouth now was too tight. So I opened it up a bit with a file.


And that's about it. Cleaned it up a bit, a coating of linseed oil again and furniture wax. The tote looks a bit weird with that big bulge in the front, but it fits my hand very well. The plane works excellent now, even against the grain on this piece of oak, withthe capiron set tight to the edge.


And this is now my family of bench planes. I want to get more familiar with them, so I am going to use them exclusively for a while. The upcoming table project will be a great test for the planes.


Language switch

From now I'm going to write this blog in English. Hopefully it will increase the reach a bit. Every Dutchman can read English anyway.

Foreign languages were never my strongest point. So I will make lots of spelling errors, gramatical mistakes, weird sentences and so on. luckily I don't care about that at all. Hopefully you won't either.

Have fun reading this blog.